(1) Correct ways of installation
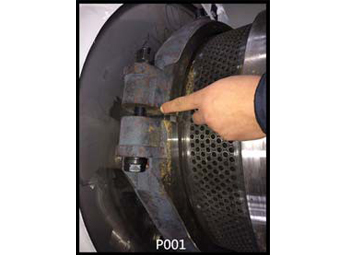
① (Fig. P001) First of all, fasten one die clamp with positioning threaded hole on driving wheel, and then fasten another two die clamps on driving wheel. Lock tightly after uniform adjustment. Pay attention to: there are three uniform gaps on joint of three die clamps.
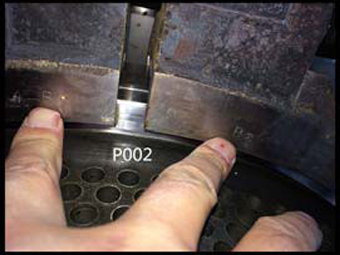
② (Fig. P002) Mark of the joint between two die clamps shall be the same (such as B-B).
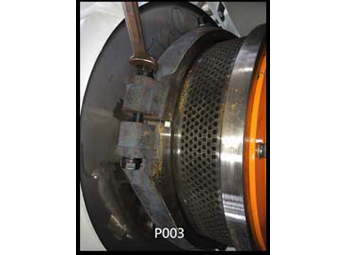
③ (Fig. P003) Main screw for tightly locking die clamp shall be checked before start of machine.
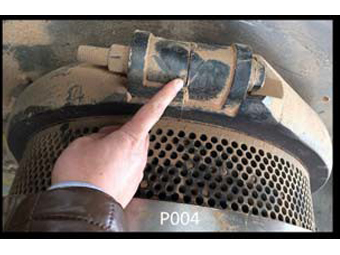
④ (Fig. P004) When two die clamps clasp each other and there is almost no gap, die clamp cannot clamp dies. It indicates that die clamp has been totally worn, and it shall be replaced.
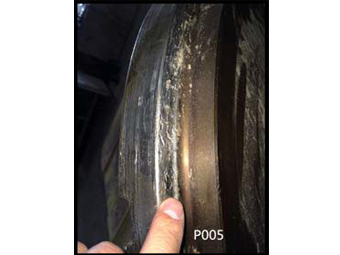
⑤ (Fig. P005) In addition, if inclined plane for installation of driving wheel is under severe wear, even new die clamp will not be tight. Therefore, driving wheel shall be replaced.
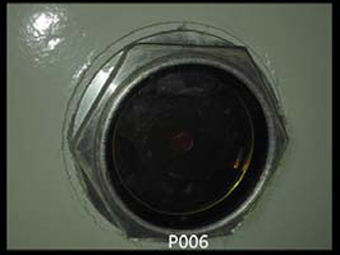
2. Grease of gearbox (Fig. P006):
With regard to new pellet mill, after three-month utilization for the first time, gear oil in gearbox shall be replaced, and scrap iron on one small magnet piece in gearbox shall be cleared. Afterwards, gear oil of pellet mill shall be replaced every 2000 hours.
There is an oil level gauge (No.501-1119) for observing oil level in the bottom of one side of gearbox. When gears are not working, there is a small bubble between oil level and the top of oil level gauge; when gears are running, oil level shall be at the middle of oil level gauge.
(1) Before starting pellet mill, operator shall inject grease to roller at first until grease overflows from shaft collars on two ends of roller, which can indicate that roller is full of grease. Then, pellet mill shall be started for 2 hours operation. Turn off the pellet mill after 2 hours operation, and open cover of it; operator shall wear protective eyewear for fear that grease will spill out and hurt personnel. Inject grease to roller again until roller is full and record quantity of grease and time. In this way, we can Picture out proper quantity of adding grease and time for every 2 hours through practice.
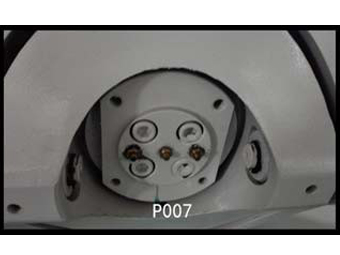
(2) (Fig. P007) When pellet mill is in continuous production, add oil lubrication from three copper grease fittings (No.: 501-0324) on shaft collars in the middle of safety housing. Copper grease fittings on two sides are used for adding oil to two rollers, and the copper grease fitting in the middle is used for adding oil to bearing of main shaft. When producing biomass wood pellet in accordance with proper oil quantity and time, add grease (30-40g/ piece-time) to roller every 2 hours (animal feed: 4 hours); add grease (40-50g/ time) to bearing of main shaft every 4 hours (animal feed: 8 hours).
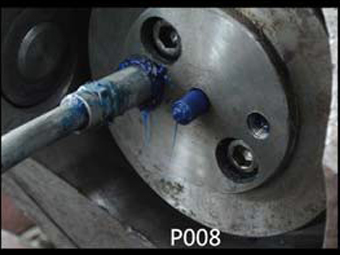
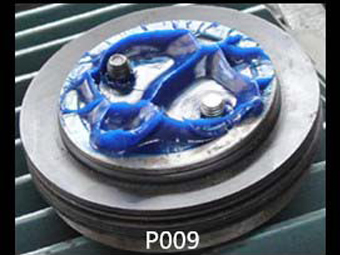
(3) (Fig. P008 and P009) If operator find oil leakage as shown in picture during adding oil, grease cannot be injected into roller and main shaft bearing, thus, bearing will be damaged due to the lack of oil.
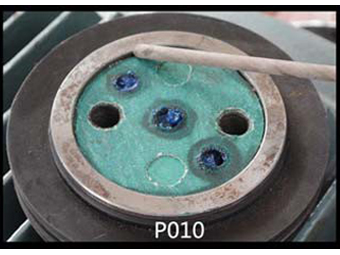
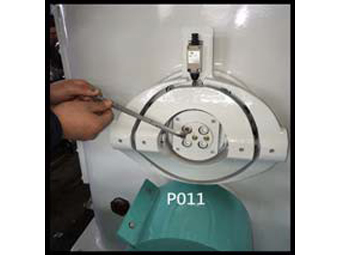
(4) (Fig. P010 and P011) Operator shall adjust thickness of sealed paper pad (No.: 501-0313) (1-3 pieces 1mm) in shaft collars of main shaft, and tighten up screw in case of oil leakage. Check screw (No.: 501-0310) constantly and tighten it.
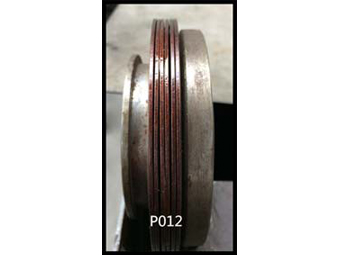
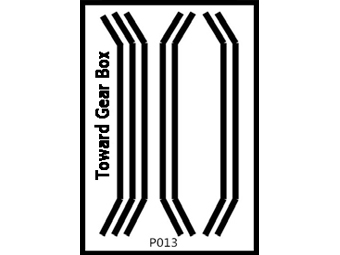
(1) (Fig. P012 and P013) Before pellet mill leaves factory, workers of wood pellet mill have installed about 6 pieces (5-7 pieces) belleville springs of right quantity and direction (Fig. P013) in gap in accordance with size of gap between end of main shaft and main shaft gland.
(2) In change of belleville spring every year, operator shall replace it in strict accordance with quantity and direction of pictures above. Random change is not allowed. When operator tightens two screws (No.: 501-0310) to fasten main shaft gland, about 0.5 mm gap shall be reserved between those belleville springs (5-7 pieces). When there is difficulty in pelleting, main shaft will have about 0.5 mm gap for elastic move, which is functioned as protection of equipment.
(3) Operator shall check whether screw (No.: 501-0310) and grease fitting (No.: 501-0324) of main shaft gland is tightened every week; if operator finds that shake of main shaft is abnormal during operation of pellet mill, especially the production of pellet which is difficult to produce such as wood pellet and cattle feeds, screw of main shaft gland may be loose during shaking, it shall be tightened up.
5. Correct installation way of shear pin (No.: 521-04S9 or 501-0409)
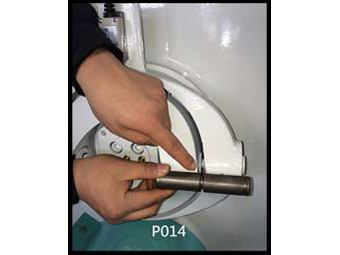
(1) (Fig. P014) Groove of safety pin shall be in the middle of gap between tooth profile flange (No.: 501-0407) and safety housing (No.: 501-0401); in this way, when die and roller is stuck and main shaft drives tooth profile flange to shift, shear pin can be cut from groove of shear pin and it can be functioned as protection for pellet mill. Proper installation of shear pin is shown in Fig. P014.
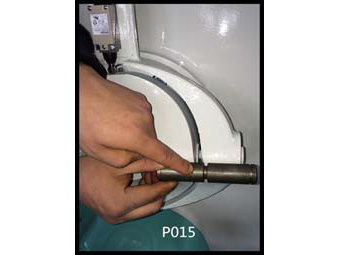
(2) (Fig. P015) In operation of pellet mill, sometimes, retaining clips (No.: 501-0410) on two ends of shear pin are not installed, and it leads to dislocation of shear pin, and groove are not in the middle of gap between tooth profile flange and safety housing; when main shaft drives spline flange to shift under state of emergency, safety pin cannot be cut. Thus, main shaft or drive system of pellet mill will be damaged. As shown in Fig. P015, safety pin has been dislocated and in improper position.
6. Cause of main shaft (No.521-03S1 or 0301) and quill shaft (No.521-05S0 or 0500) quivering
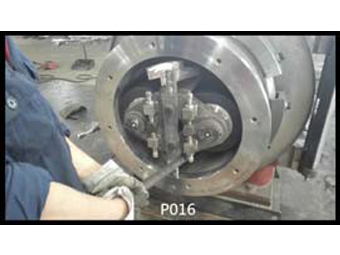
When the main shaft is correctly and properly installed, suspend the main shaft end cap (NO.501-0308) tightly. The 5 to 7 belleville springs (NO.501-0312) on the gland are pressed with a gap of only about 0.5mm. The gap between the tooth form end of the main shaft and the tooth profile flange base shall be small they shall match tightly. At this time, if the operator loosens the compression roller assembly, (Fig. P0106) uses a peeler to pry the head of the main shaft in the die, the head of the main shaft will not move.
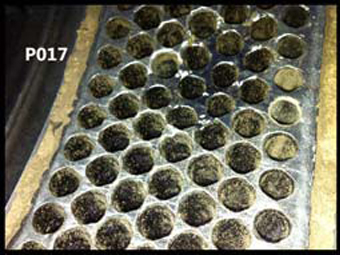
Thus, when the pellet mill makes pellet, the head of the main shaft will not quiver and can provide maximum pressure to squeeze the materials out of the die. The function is especially evident when such materials hard to granulate as sawdust and rice hull granule are squeezed out. If the main shaft quivers and retreats, granulating pressure will decrease obviously; at the normal working gap between the die and the roller, the granulation is inefficient with hard granule output and obvious decrease of capacity. In this case, the operator will generally adopt the wrong method of tightening the roller against the working zone in the inner wall of the die. Though this method can steady the output temporarily, working zones of roller and the die can be seriously damaged (as shown in Fig. P017) in short time, which causes poorer quality and capacity of granules and greatly shortened service life of die and the roller.
(1) Fastening screws of the safety housing are loose.
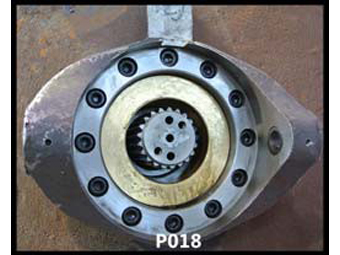
Solution: the operator takes off the tooth profile flange, checks if the 12 (6) screws and spring cushions are sound, changes the broken screws and then fastens the screws (as shown in Fig. P018).
(2) Two fastening screws of the main shaft are loose.
Solution: fasten the screws (as shown in Fig. P011).
Solution: because the safety housing assembly comprises the safety housing and the tooth profile flange that work together, the operator should replace the safety housing assembly with new one.
(4) The bearing of the main shaft has been damaged due to wear or burned out due to oil break. Solution: the operator should change the bearing of the main shaft (No.501-0307).
(5) Decentraction of the quill shaft leads to the quivering of the main shaft. Solution: change the quill shaft.
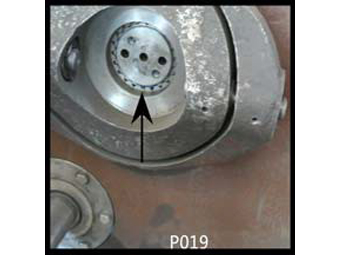
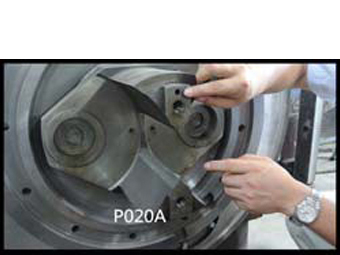
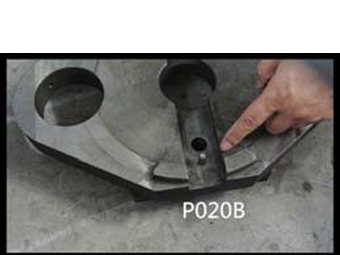
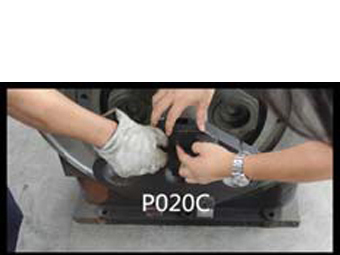
(6) The head of the main shaft and the pressing plate comprise the main shaft assembly. One taper locating pin positions the pressing plate at the head of the main shaft to ensure the two roller assemblies concentric with the main shaft. If the operator turns the pressing plate for 180° and installs it on the head stand of the main shaft wrongly, the two compression rollers will not be concentric with the main shaft; thus, the die will strike the roller at this moment and separate from it at that moment, which damages the equipment. Solution: the operator accurately finds the locating hole, installs the locating hole of the pressing plate on the head stand of the main shaft correctly, blows in the taper locating pin and then fastens the pressing plate with two screws tightly (as shown in P020).
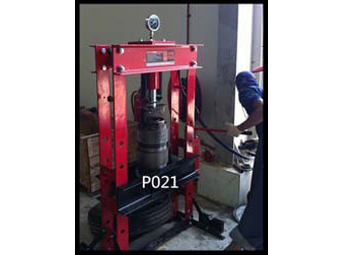
(7) The bearing of the roller has been worn, resulting in waggle of the outer shell of the roller, which will add to difficulty to the granulating. Solution: the operator should change the worn bearing several days before the bearing is damaged; thus, the roller shell and inner parts will not be damaged and can be used several times (as shown in Fig. P021).
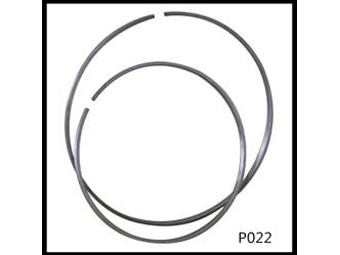
(8) The wear ring of the die has been worn and the inner size is relatively big, which causes the dies to retreat during its working when it is compressed, thus being hard to granulate. Solution: the operator changes the wear ring of the die (as shown in Fig. P022).

(9) Each time the operator changes the die and installs it, after operating for two or three hours, the die clamp screw will be partial loose; the die clamp will not hold the die tightly; the die will shake, making it difficult to granulate. The solution: each time after the operator changes the die and makes it operate for two to three hours, the operator shall stop it and lock the die clamp screw tightly again to make sure that the die clamp holds the die tightly.
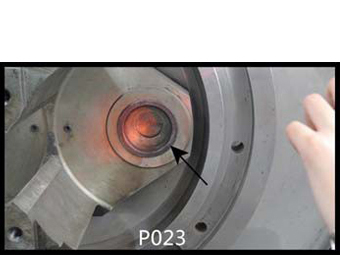
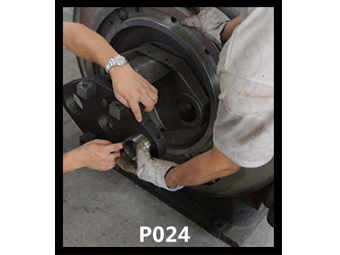
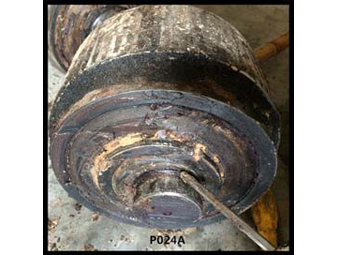
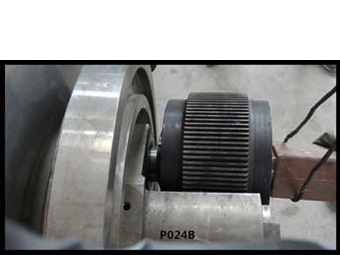
(11) The front and back bushings (No.521-03S3/03S2) of roller in the main shaft hole have been worn and the hole is enlarged, causing that the compression roller shakes and leaks grease in the work and grease can not be added to the roller. The solution: the operator changes the bushings (Fig.P023/P024). In addition, “O” circle of the 520S die shall be sheathed to avoid oil leakage (as shown in Fig. P024A), and lever principle shall be used to facilitate the installation of roller assembly (as shown in Fig. P024B).
7. Coordination of die , roller and feeding scraper
(1) The principle of adjusting the gap between the die and the roller: to get close furthest but not to contact and abrade with each other. On the premise that the roller and the die do not abrade with each other, the extrusion force of granulation shall be maximized as far as possible. The best gap: wood material 0.3-0.5mm (animal feed: 0.1-0.3mm).
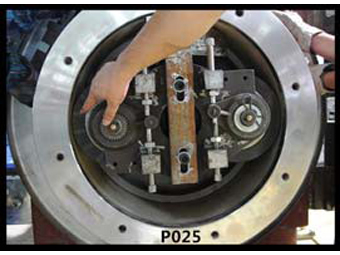
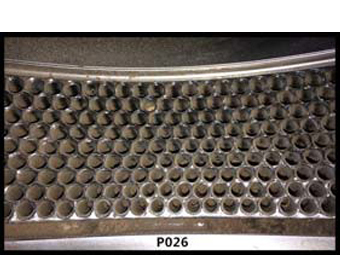
① The new die will have slight deformation due to the heat treatment, and we control the deformation of unilateral within 0.25mm at delivery. Likewise, the new roller will have slight deformation, too. Firstly, we fill the two roller assemblies with lubrication oil, so it will operate not so sensitively; then, we gradually turn down their gap according to the arrow direction of the adjustable gap wheel, and when the operator rotates the die by hand, the compression roller operates in only 5% to 10% of the time. The gap of that time is 0.3-0.5mm, which is relatively ideal (as shown in Fig. P025). In this way, not only the discharging of granulation is normal, but also their lifetime will be maximized. They hardly contact and abrade, but let the materials abrade the die hole. The bank between the die holes becomes knife mouth and the abrasion of the die holes is very uniform and beautiful (as shown in Fig. P026).
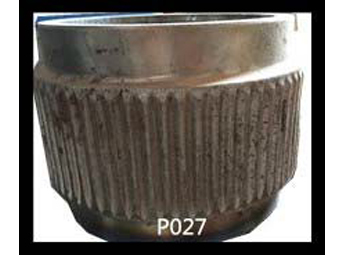
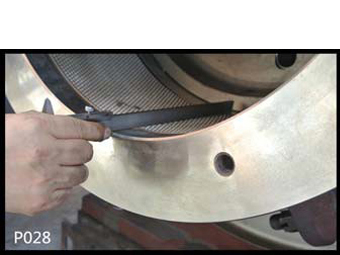
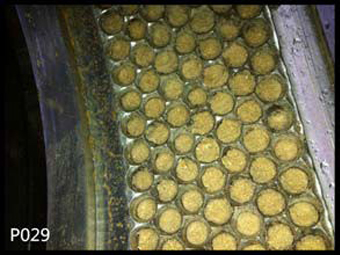
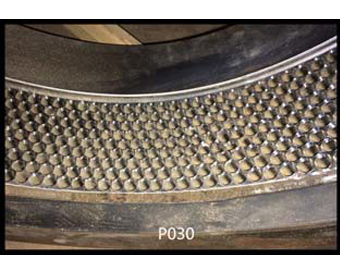
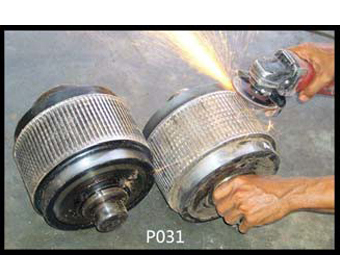
(2) The principle of the cooperative application of the die and the roller: their working faces shall be identical as far as possible and shall be abraded uniformly, making the gaps (0.3-0.5mm) of the nearest areas are almost the same (as shown in Fig. P027/P028/P029/P030). The lifetime will be maximized and this is a very good phenomenon.
① A new die usually matched two pairs of new roller assembly for equal lifetime use. The one die and two pairs of roller assembly of each group will be marked and used in groups, and the two pairs of the roller assembly are used and maintained in turns every week. The compression roller assembly in the left (right) is always used in the left (right), and the left and the right locations can not be paired and exchanged arbitrarily for the use.
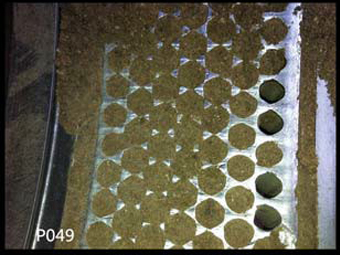
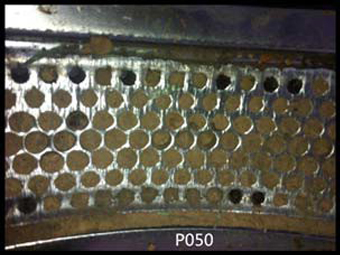
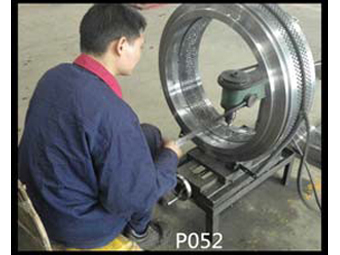
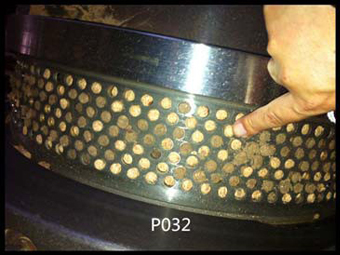
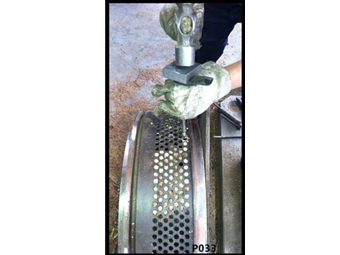
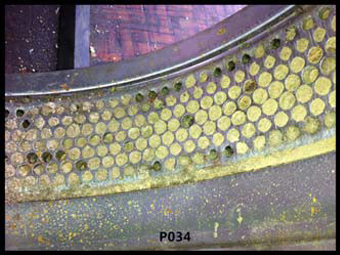
If the operator finds that some die holes have been clogged (as shown in Fig. P032), he shall clean up all the clogged holes at once and make every hole produce granules. Otherwise, the hole that does not granulate will protrude and scratch the surface of the roller to form a groove and further cause the difficult discharging and production reduction of the die holes of this round. The working area of the inner wall of the die will also be uneven (Fig. P034) and the lifetime will be shortened greatly, which is not a good phenomenon. In a word, the operator shall try his best to make every hole produce granule.
① The large feeding scraper must be installed on the outside of the upper of the pressing plate of the main shaft (Fig. P037) to feed all the rest materials to the working area of the right roller, and the small scraper is installed on the bottom of the outside of the bottom of the pressing plate of the main shaft (as shown in Fig. P036) to feed part of the materials to the inner working area of the left roller; and the rotation force of the die cover will throw a part of materials into the middle and outer working area of the left roller. In addition, the root of the head support of the main shaft is installed with two small feeding back scrapers (No.501-0329) which are mainly used to scrape the materials accumulating on the inner empty shaft flange back to the suppressing working area of the die.
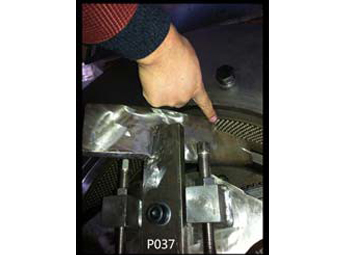
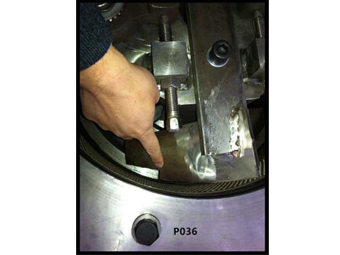
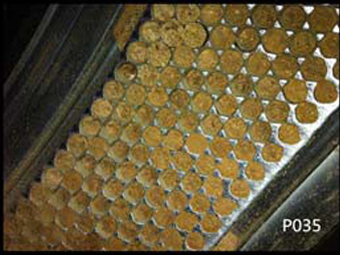
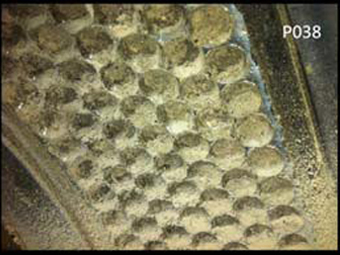
② The operator shall appropriately adjust the length, width and angle of the feeding scraper according to the attrition rate of the working surface of the die and the roller to guarantee that the die eats materials uniformly and the roller abrades uniformly. If the operator finds that the rows of the holes outside the die and near the feeding scraper are abraded slowly (Fig.P035), it means the feeding materials of these rows of holes are fewer, and the feeding scraper shall be adjusted to make the gap between these rows and it a little bigger and make these rows fed more materials (Fig.P036). If the operator finds that the rows of holes inside the circular mould are abraded slowly and discharge less, he shall lengthen the feeding scraper (Fig.P037) to make more materials be feed into the interior. In a word, the operator shall try his best to make the working surface of the die flat and abraded uniformly (Fig.P038).
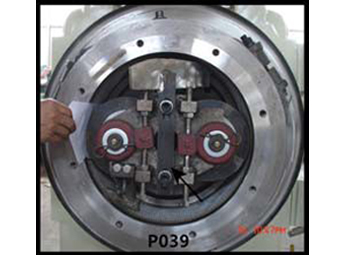
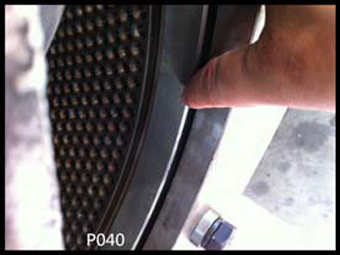
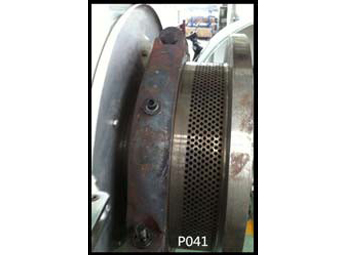
① The flange is used to reinforce the die and avoid the deformation and cracking of the die during the course of production. The operator shall make the contact cant of the mounting flange and the die contact uniformly along the circumference of a circle, make sure that there is a gap of 1-3mm between the end face of the die cant and the bottom face of the flange and the gap is uniform in size along the circumference of a circle (Fig.P040 and P041); in this way, the reinforced flange can indeed lock the circular mould tightly and come into play to protect the die. If the operator finds that the fixed screws of the flange become easy to fracture, it means that abrasion of the cant of the flange is greater than that of the die, there is no gap (0mm) between the their end face and bottom face which have clung to each other closely, and the old flange shall be replaced with the new one at once.


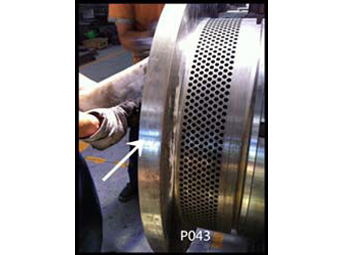
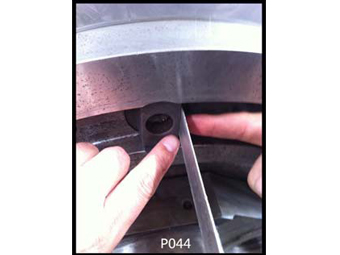
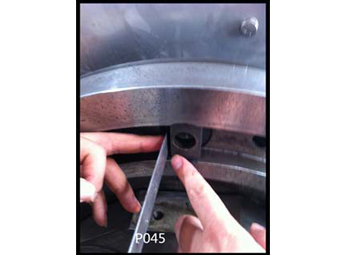
③ The correct installation way (Fig.P044 and P045) of the driving key of the die (No.501-0512). The operator stands before the driving wheel, and the hypotenuse of the driving key is on the left (Fig.P045) and the straight flange shall be on the right (Fig.P044).
9. Correct installation way of the coupling assembly (No.505-21SA/210A)
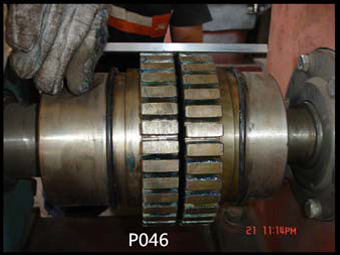
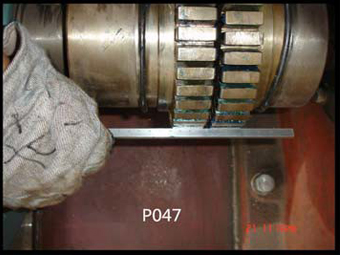
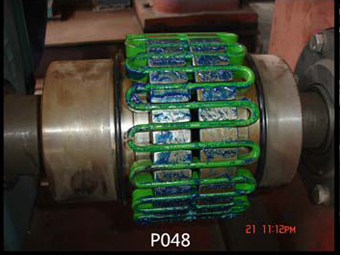
Copper pad wafer of 0.3-1mm can be used to put at the motor foot pedestal or the foot at the bottom of the gear case to adjust the shaft of the motor and the gear shaft of the gear case to the same horizontal line; the top and the two sides of the right and left half couplings shall be measured by leveling instrument to make sure that the right and left half couplings are at the same horizontal line, so that the shaft of the motor and the gear shaft of the gear case are at the same horizontal line (Fig.P046, P047 and P048).
